Downloading your historical data from Reckon One
Getting started with new systems is always tricky, we know! This is why we have created this quick guide on preparing your historical data. Please set aside 10-15 minutes to get through it. And remember – this only has to be done once – participating in KPI Works in subsequent months takes mere minutes.
By uploading this historical data into your KPI Works dashboard, you’ll be able to see the trends that have been taking place within your organisation – and within your wider industry – right away. Also, some KPIs that we show you (e.g. insurance spend as a % of revenue) can only be calculated on an annualised basis – which is the second reason we ask for this historical data upfront.
Let’s get started!
Foreword: Reckon One does not have the capability to export the Profit and Loss, or, the Balance Sheet into a multi-month format. This means that you will simply need to repeat the below processes multiple times to generate files for multiple months of your historical data.
Skip to:
Historical Profit and Loss
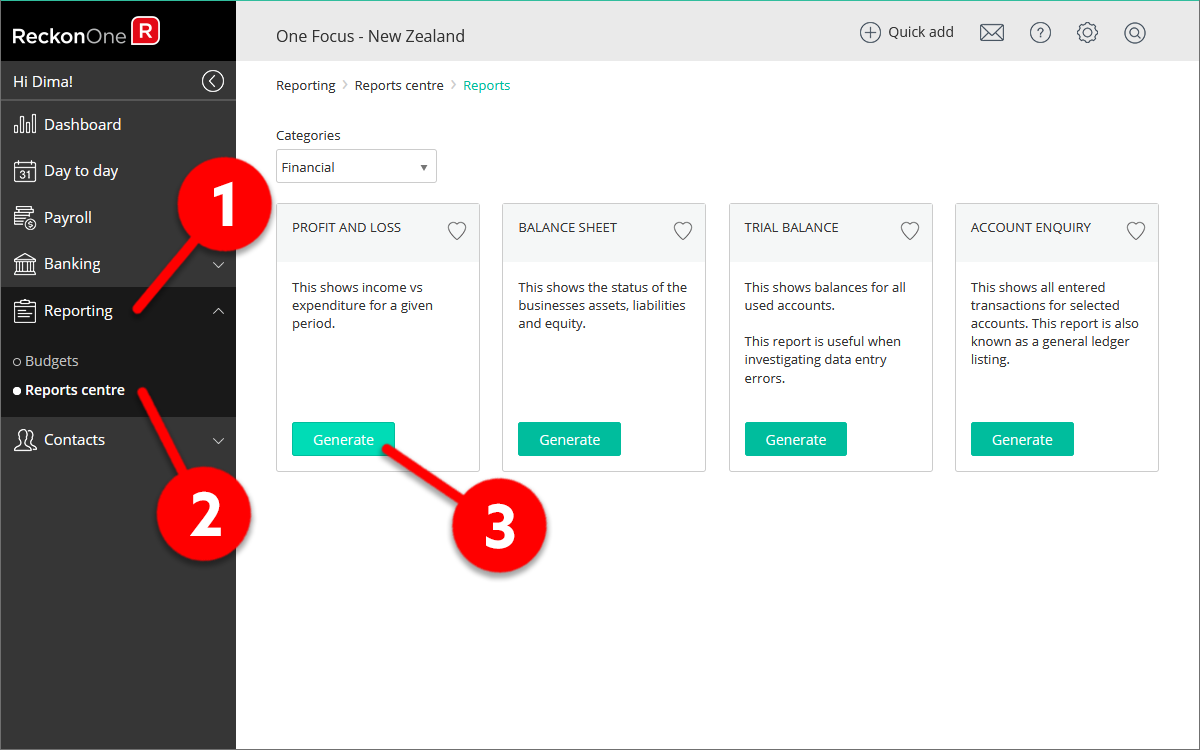
Once you’ve logged into Reckon One, click on the Reporting tab (1), and select Reports centre (2). Once the Reports centre opens, find PROFIT AND LOSS and click Generate (3)
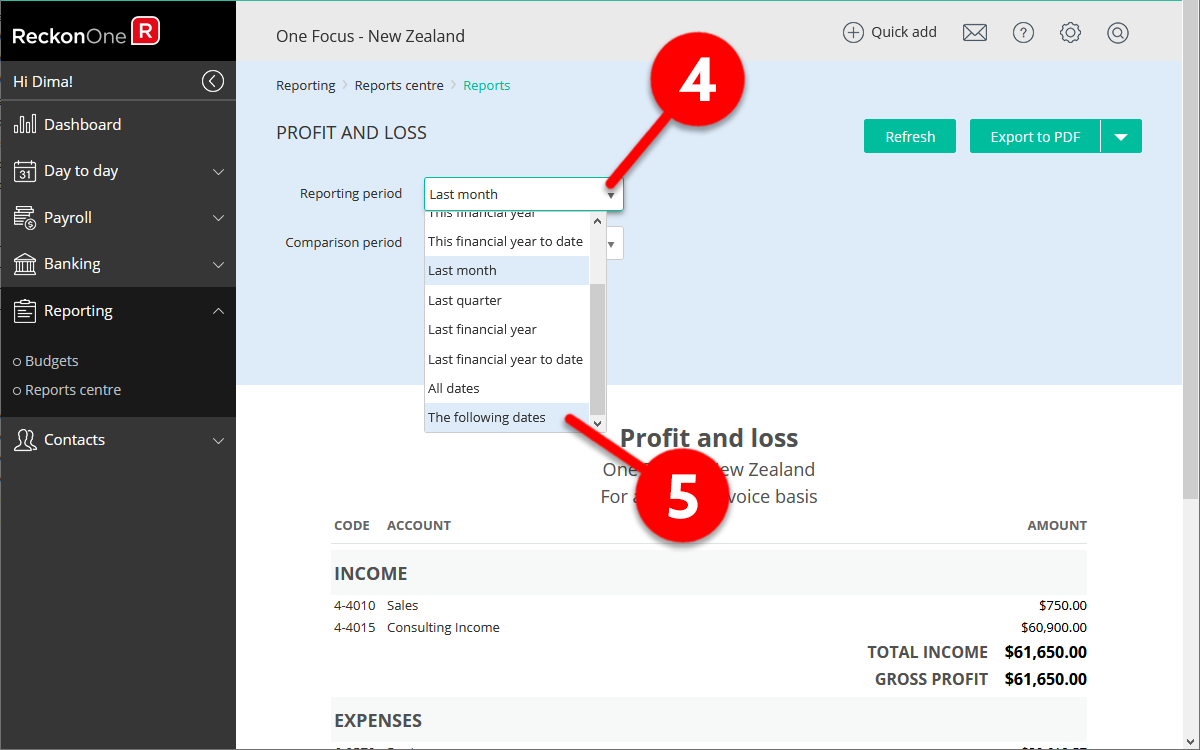
Click the drop-down triangle in the Reporting period window (4), and select The following dates (5)
Next, set the From and To dates (6) to the first and the last day of the month you’d like to download the Profit and Loss report for, click Refresh (7), and after the screen updates – click on the Export drop-down triangle (8) and click on Export to XLSX (9). This will generate an Excel file – please save it to your computer with an appropriate name (e.g. Profit and loss Nov 2020) so you can easily identify it later.
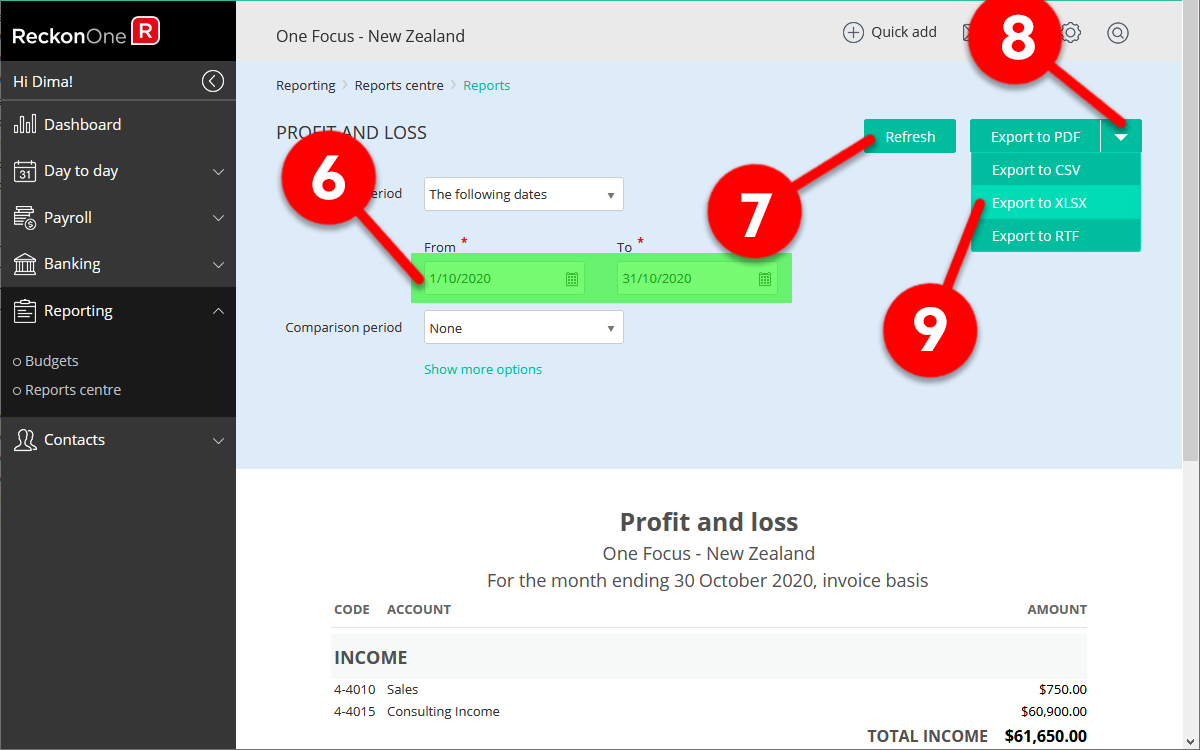
You will need to repeat steps 6 to 9, above, for each historical month you’d like to download your data for.
Feel free to click here to download a sample file to see if yours looks similar.
Historical Balance Sheet
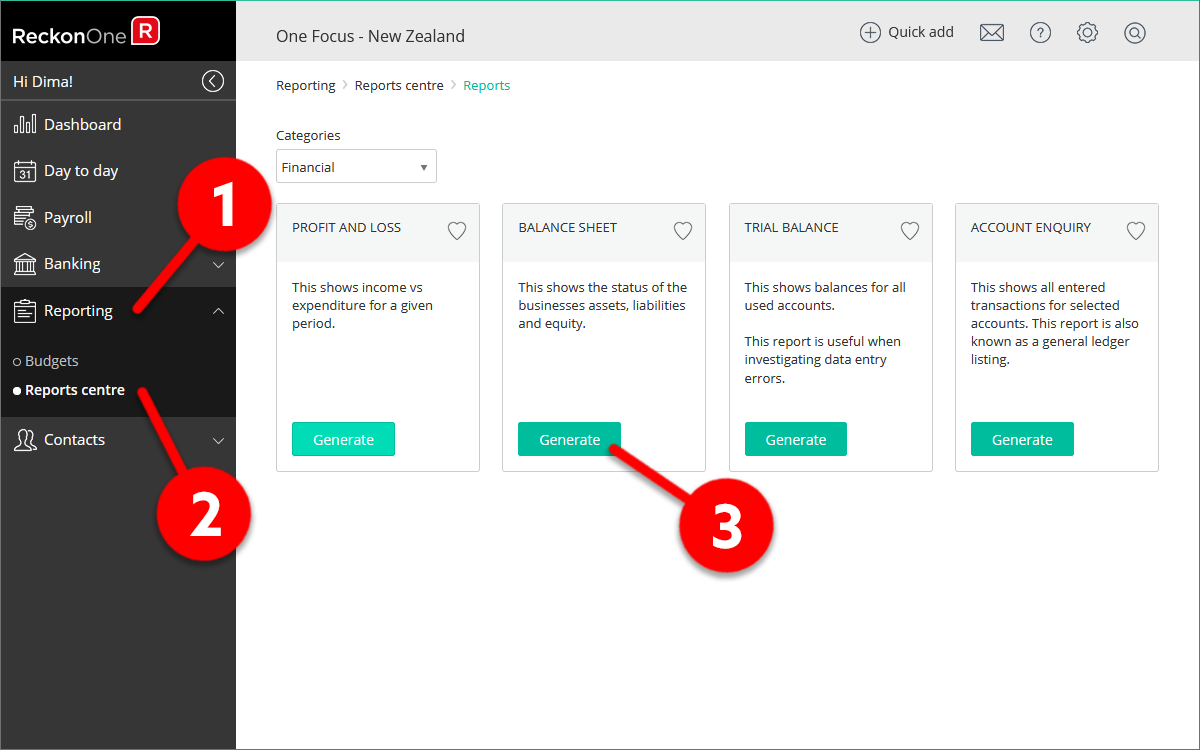
Once you’ve logged into Reckon One, click on the Reporting tab (1), and select Reports centre (2). Once the Reports centre opens, find BALANCE SHEET and click Generate (3)
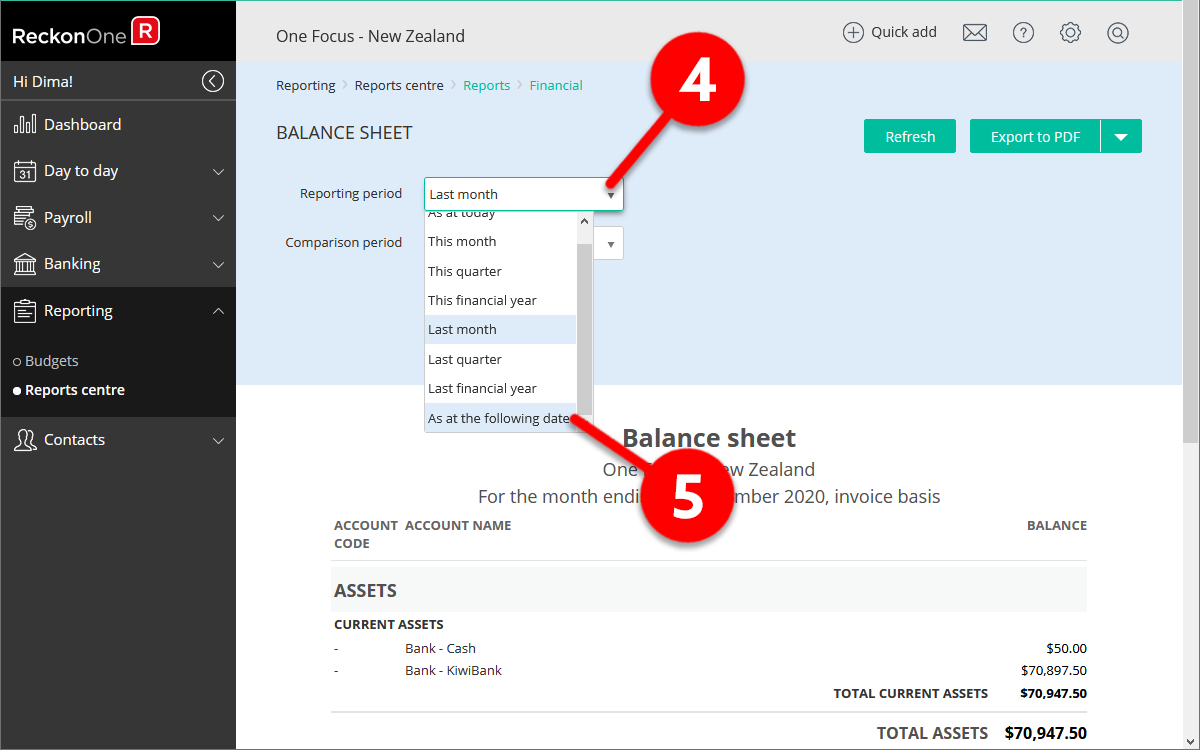
Click the drop-down triangle in the Reporting period window (4), and select As at the following date (5)
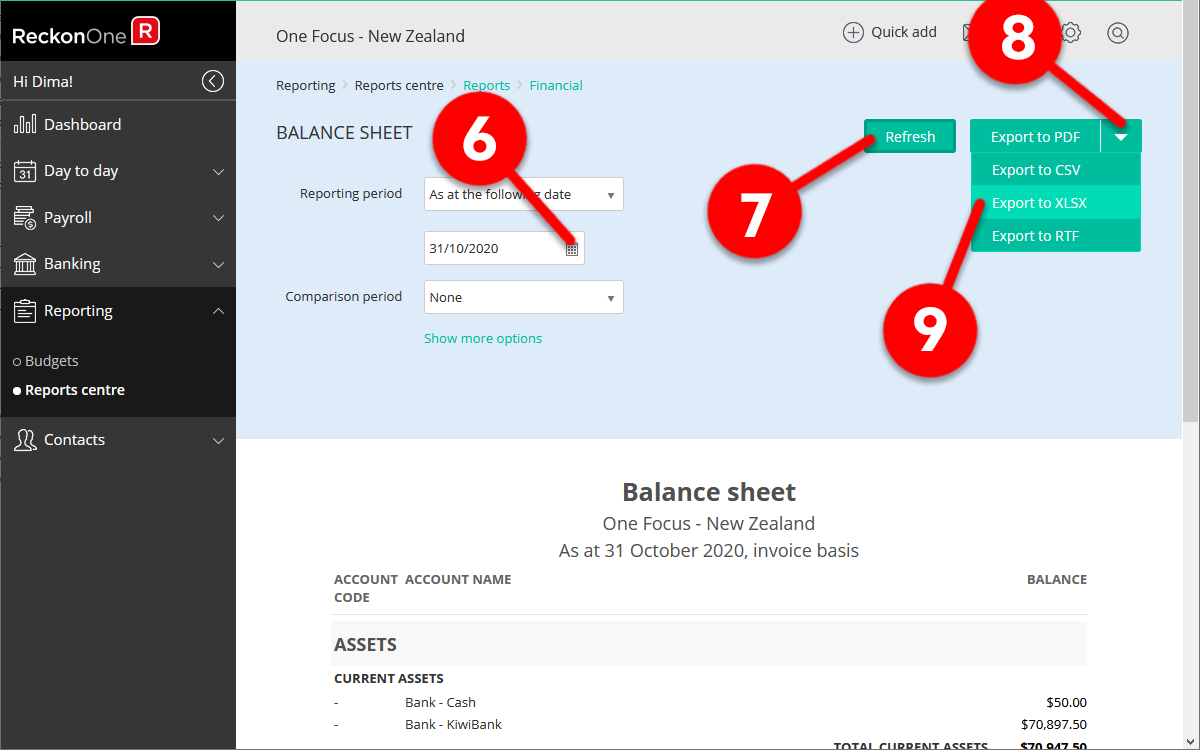
Next, set the date to the the last day of the month you’d like to download the Balance Sheet report for (6), click Refresh (7), and after the screen updates – click on the Export drop-down triangle (8) and click on Export to XLSX (9). This will generate an Excel file – please save it to your computer with an appropriate name (e.g. Balance sheet Nov 2020) so you can easily identify it later.
You will need to repeat steps 6 to 9, above, for each historical month you’d like to download your data for.
Feel free to click here to download a sample file to see if yours looks similar.
Why we ask for historical data
Just in case you’re curious about “Why do you guys ask for our historical data?”, please watch this short 1-minute video:

