Downloading your historical data from Quickbooks
Getting started with new systems is always tricky, we know! This is why we have created this quick guide on preparing your historical data. Please set aside 10-15 minutes to get through it. And remember – this only has to be done once – participating in KPI Works in subsequent months takes mere minutes.
By uploading this historical data into your KPI Works dashboard, you’ll be able to see the trends that have been taking place within your organisation – and within your wider industry – right away. Also, some KPIs that we show you (e.g. insurance spend as a % of revenue) can only be calculated on an annualised basis – which is the second reason we ask for this historical data upfront.
Let’s get started!
Skip to:
- Historical Profit and Loss
- Historical Balance Sheet
- Last month’s invoice count
- Providing access to your Quickbooks account
- Why we ask for historical data
Historical Profit and Loss
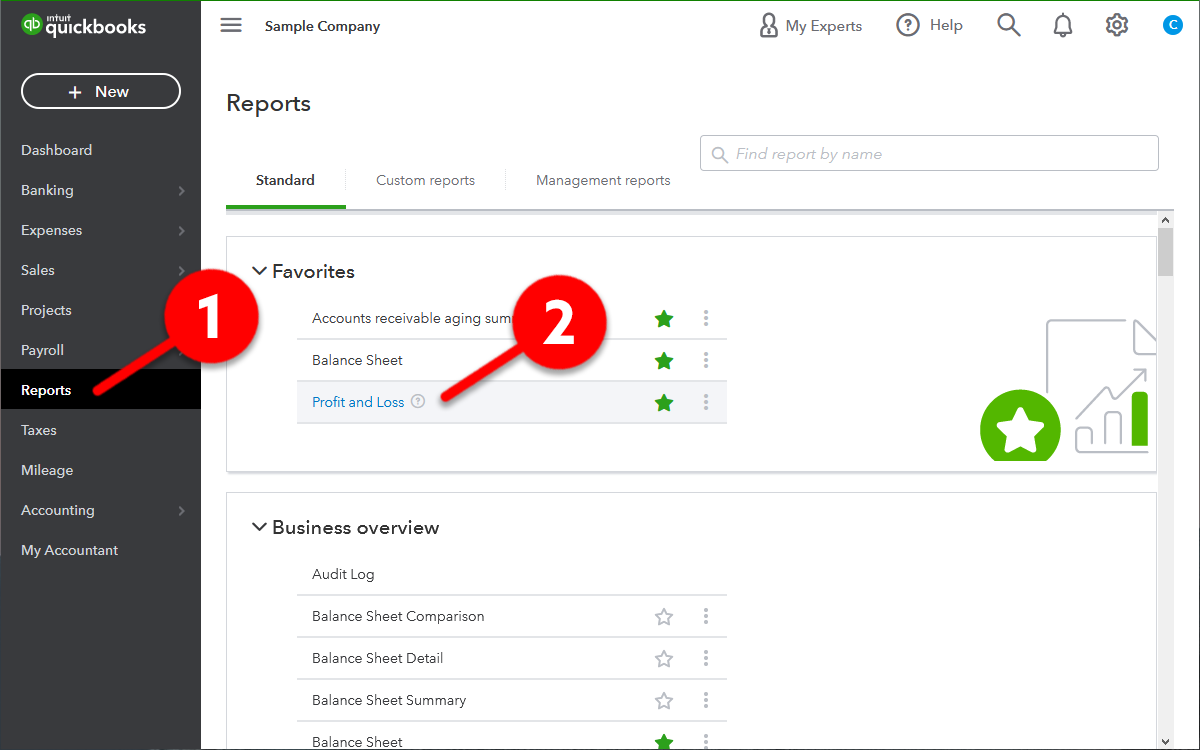
Once you’ve logged into Quickbooks, click on the Reports tab (1) and select the Profit and Loss option (2)
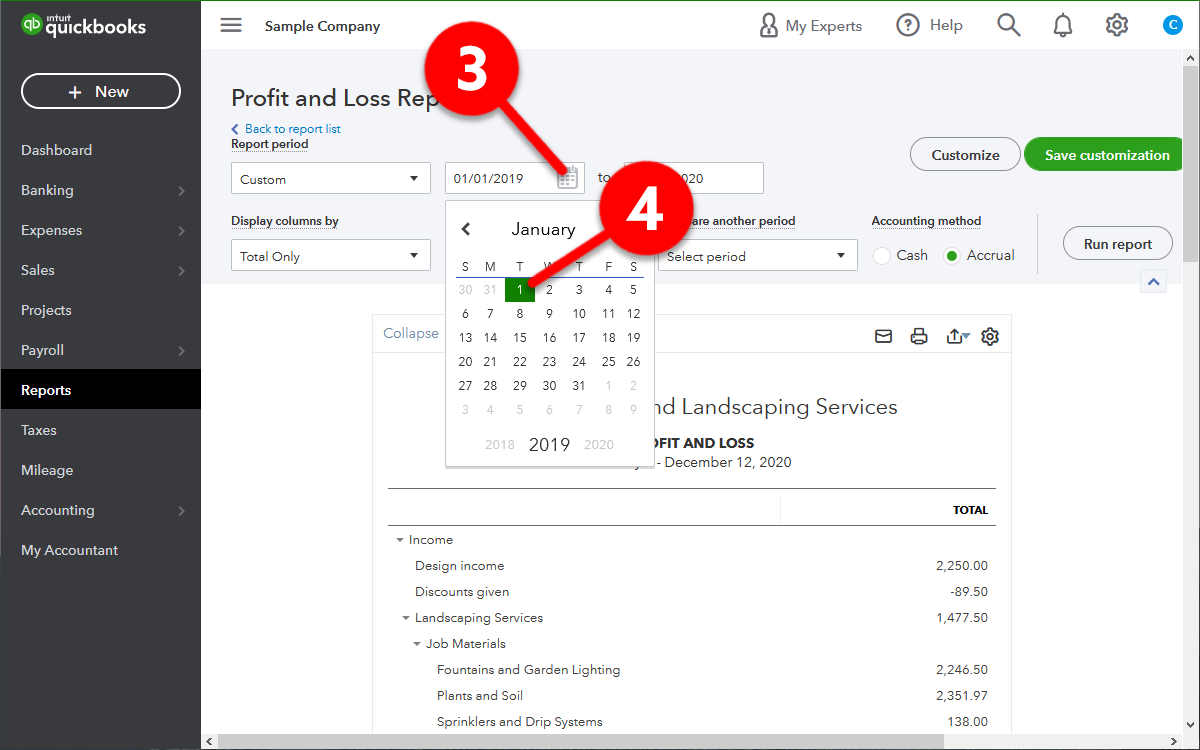
In the From window (3) select the first day of the first month you’d like to export your data for. We suggest going back as many month as you can, as they can all be processed simultaneously. In the example below, we selected the 1st of January 2019 (4)
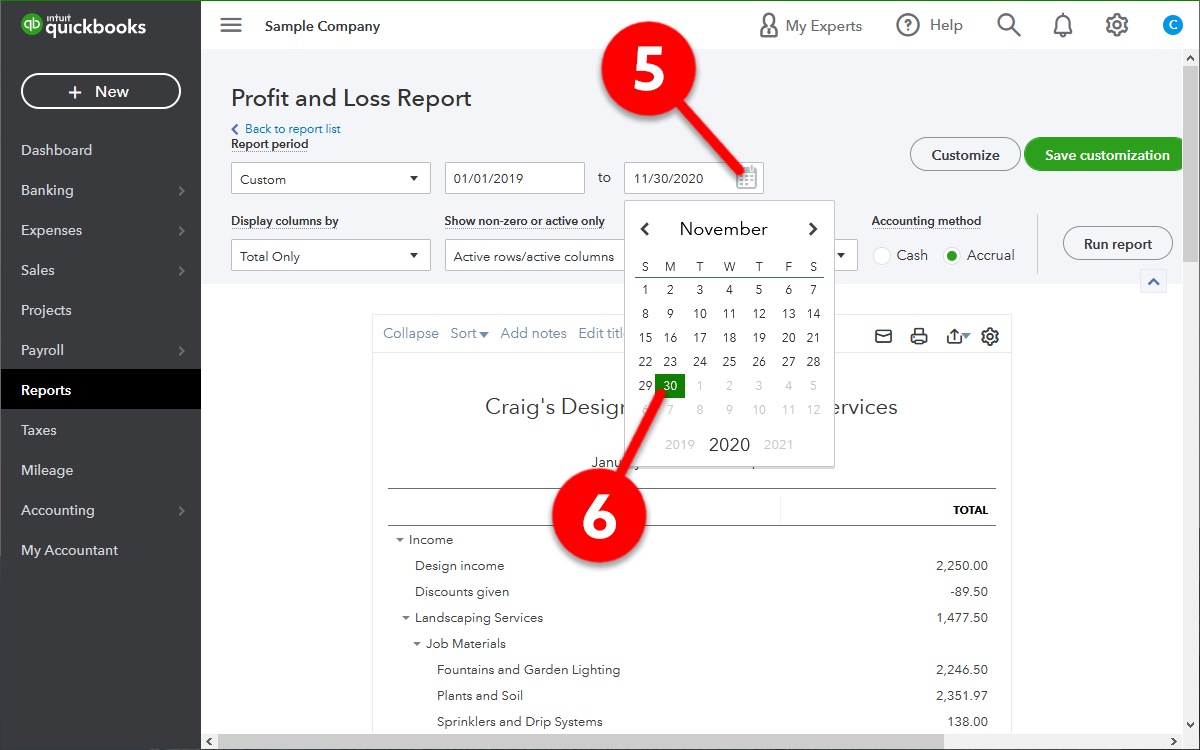
In the To window (5) select the last day of the last month (6)
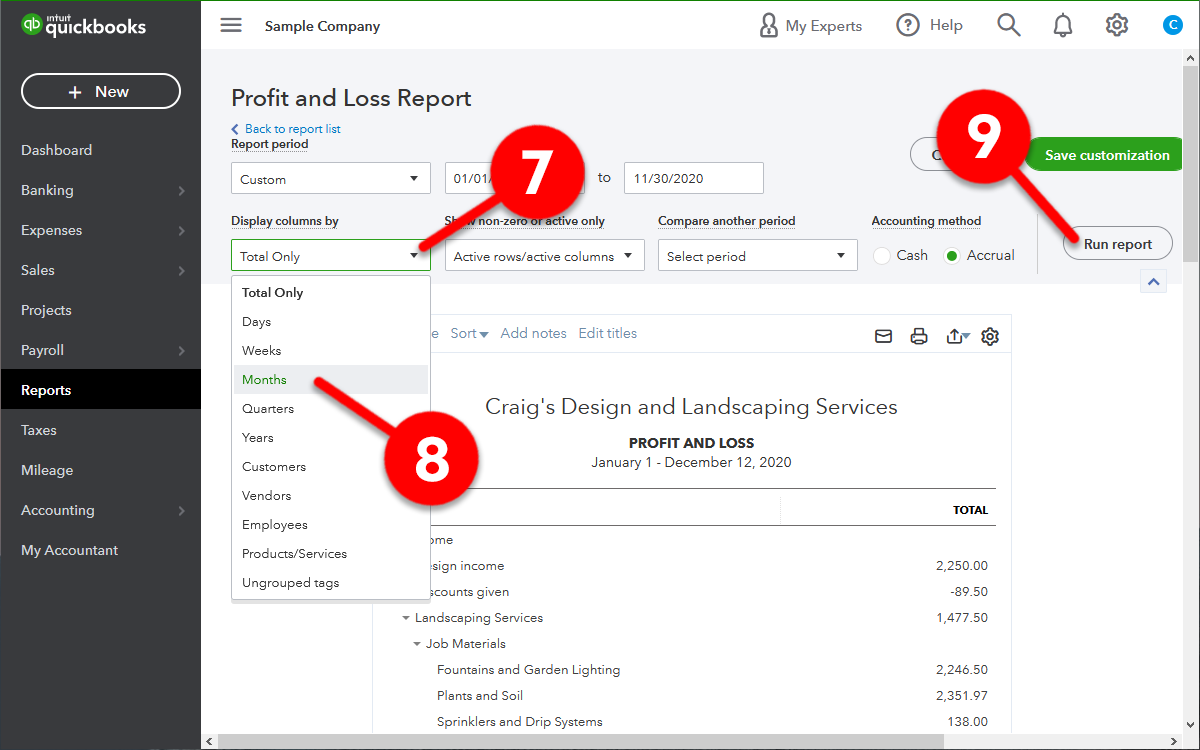
In the Display columns by window (7), click on Months (8) and click Run report (9)
Once the screen updates, click on the Export icon (10), click on Export to Excel (11) – and save this file to your computer, adjusting the file name to reflect the correct date range (e.g. Demo+Company Profit+and+Loss Jan19-Nov20).
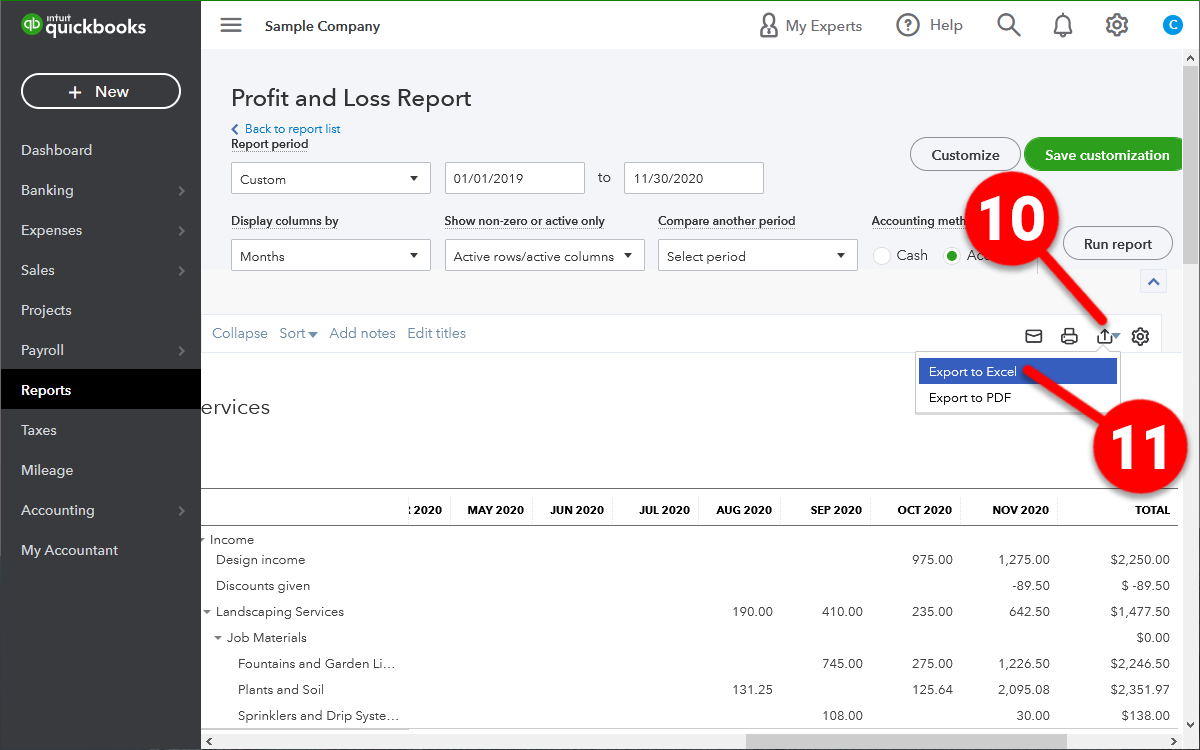
Feel free to click here to download a sample file to see if yours looks similar.
Historical Balance Sheet
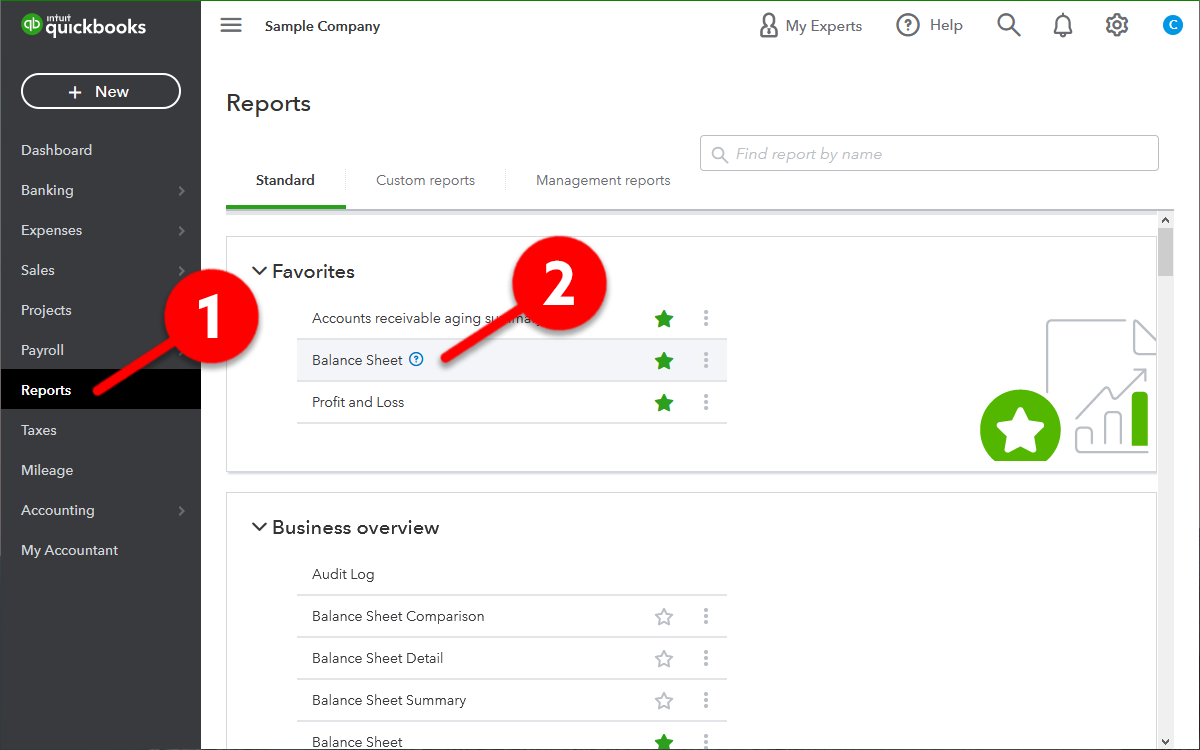
Once you’ve logged into Quickbooks, click on the Reports tab (1) and select the Balance Sheet option (2)
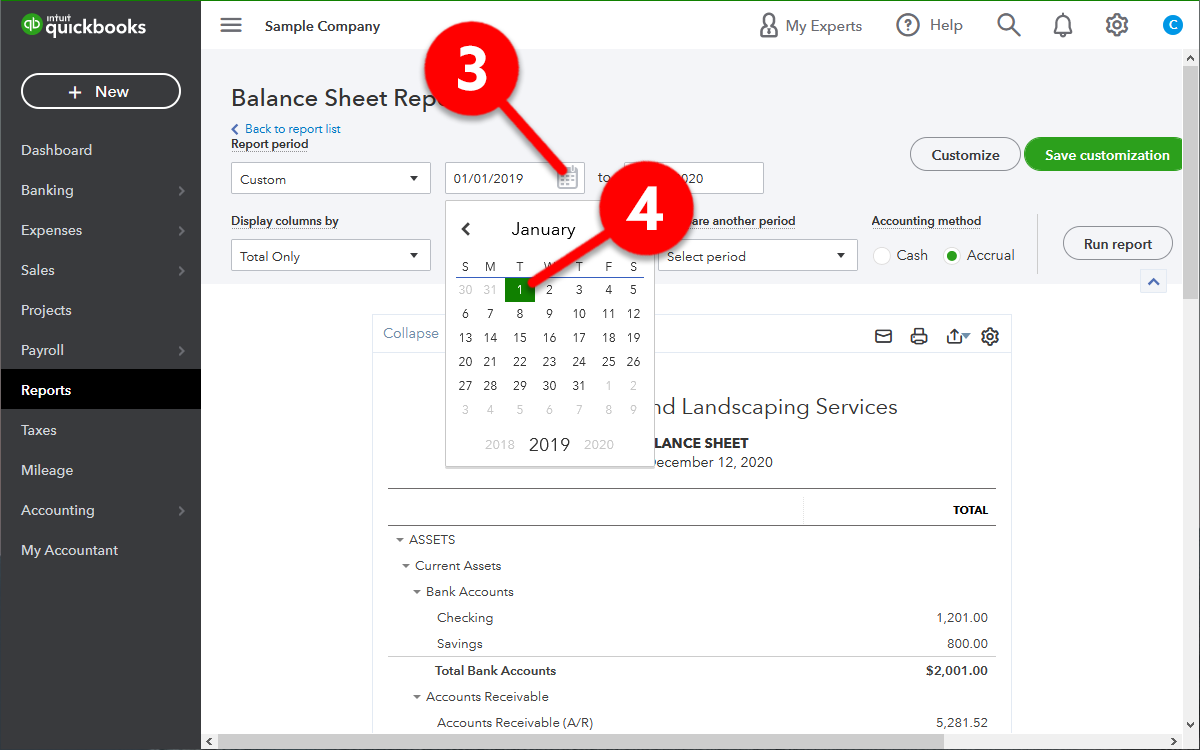
In the From window (3) select the first day of the first month you’d like to export your data for. We suggest going back as many month as you can, as they can all be processed simultaneously. In the example below, we selected the 1st of January 2019 (4)
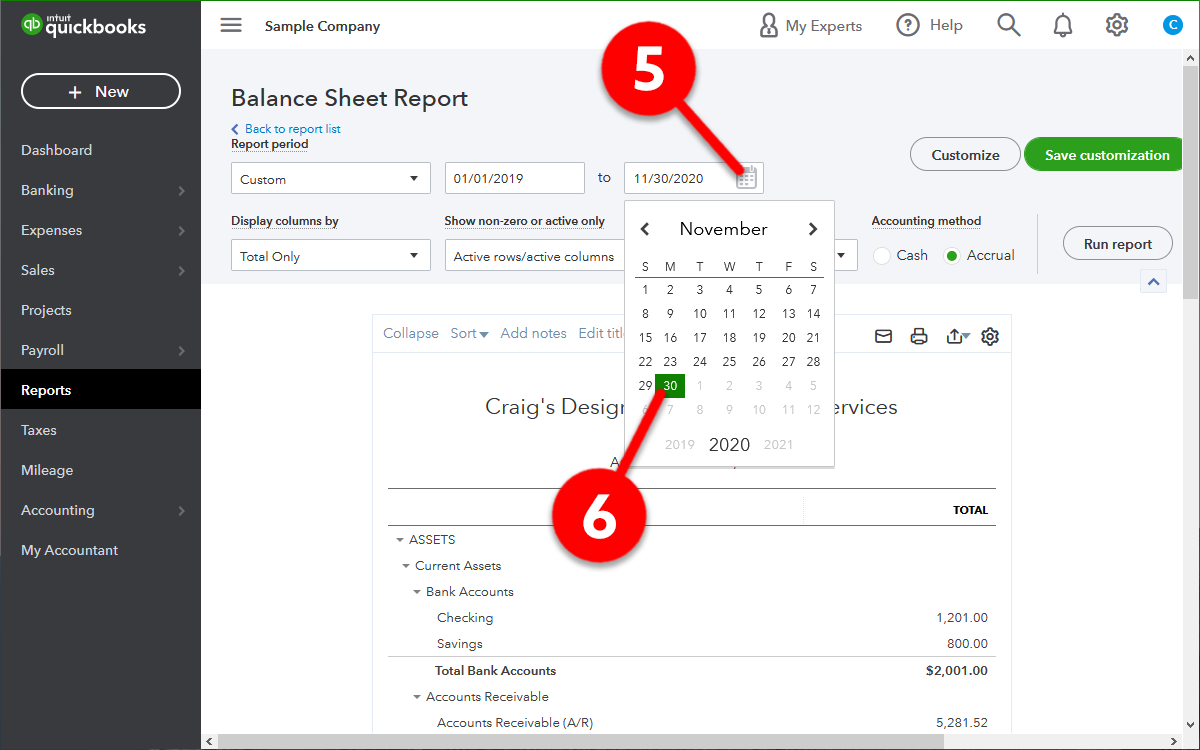
In the To window (5) select the last day of the last month (6)
In the Display columns by window (7), click on Months (8) and click Run report (9)
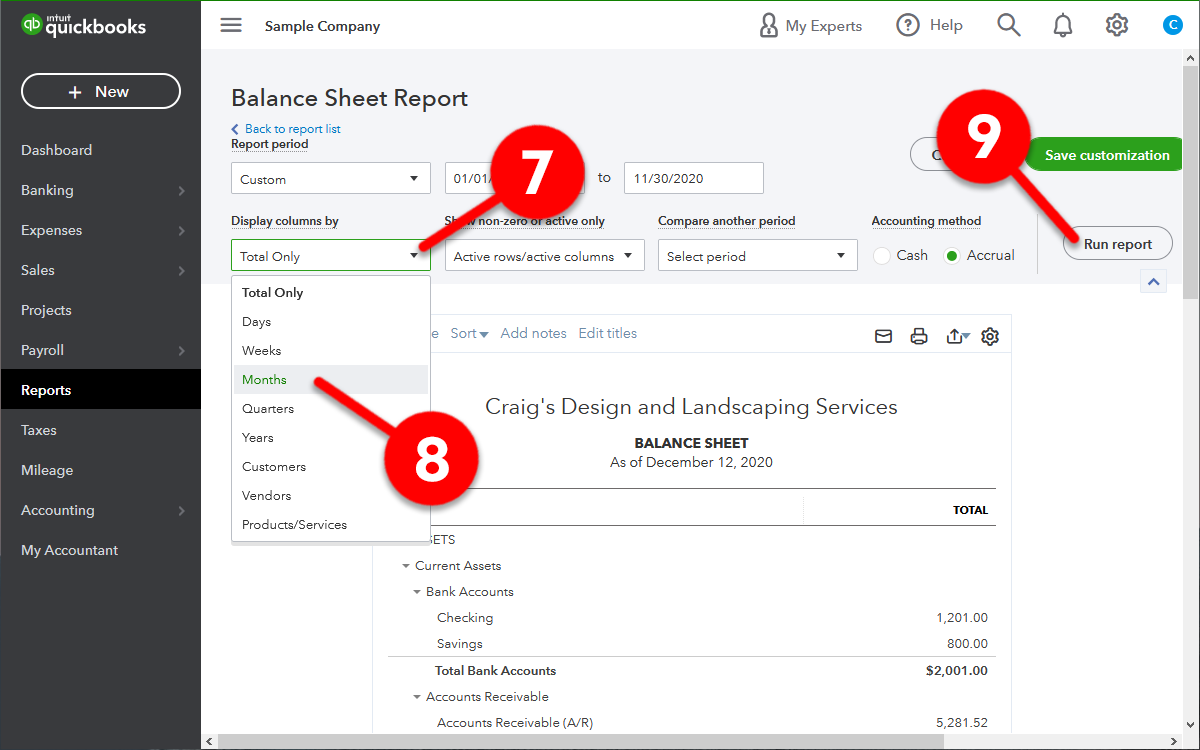
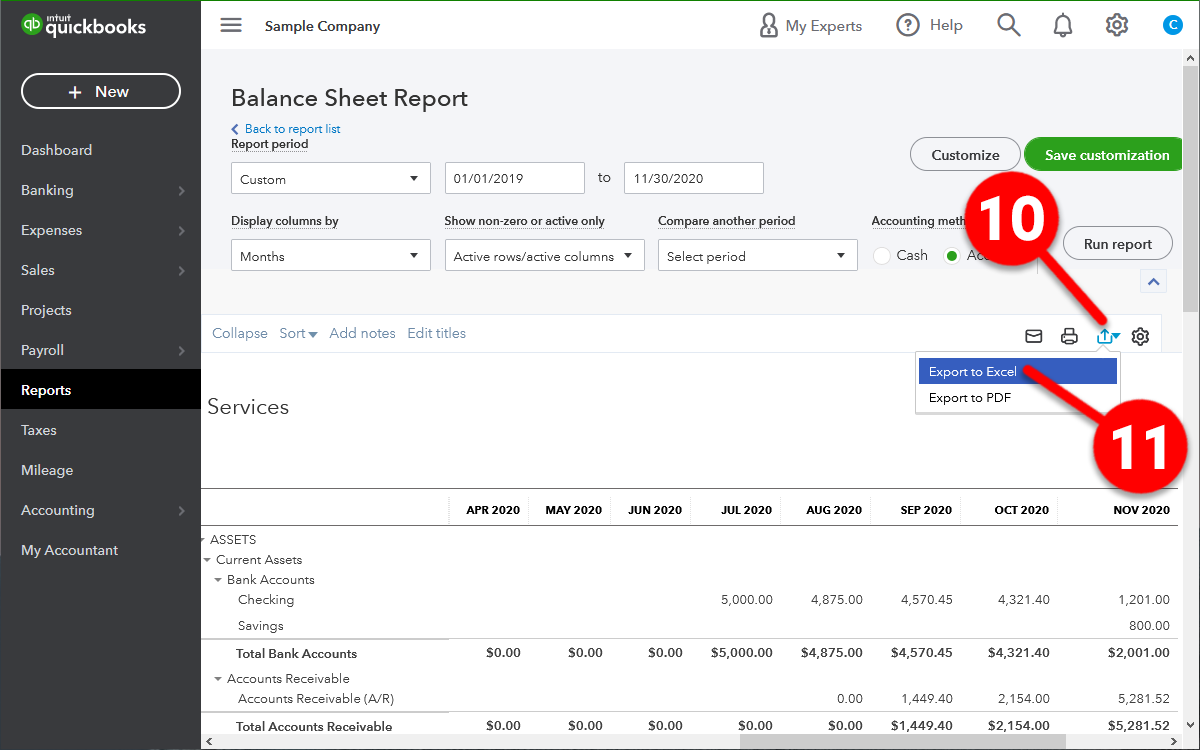
Once the screen updates, click on the Export icon (10), click on Export to Excel (11) – and save this file to your computer, adjusting the file name to reflect the correct date range (e.g. Demo+Company Balance+Sheet Jan19-Nov20).
Feel free to click here to download a sample file to see if yours looks similar.
Last month’s invoice count
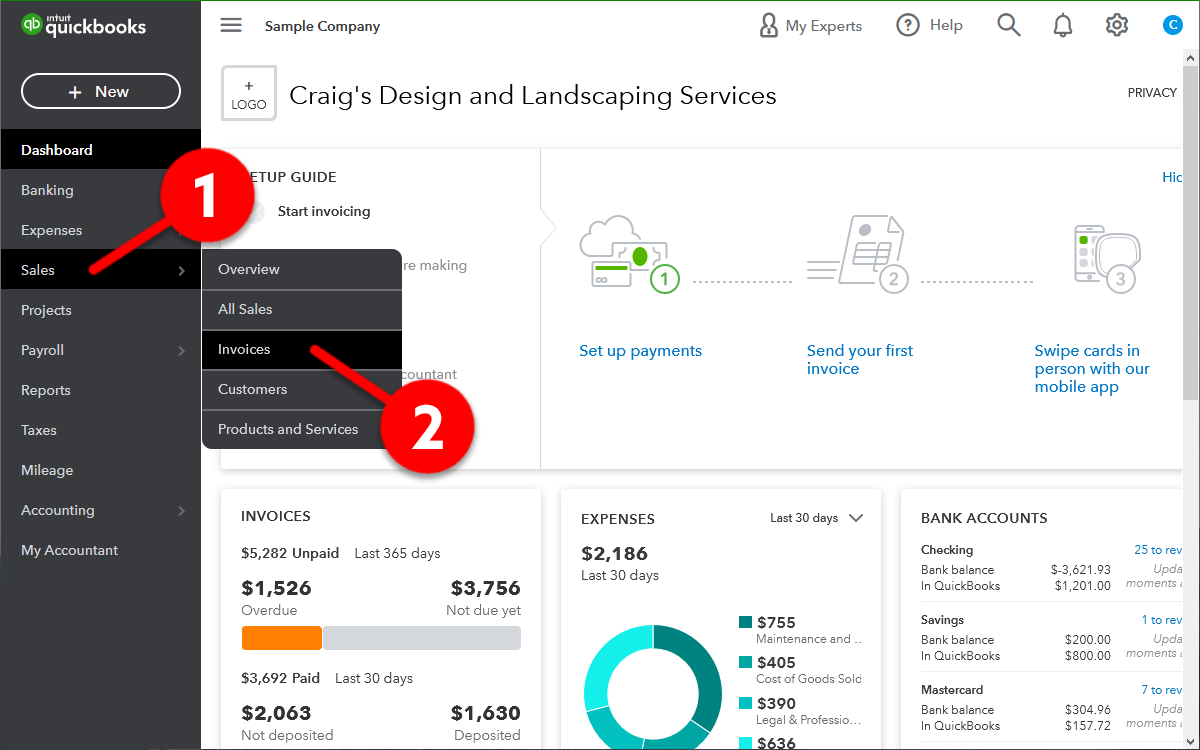
Once logged into Quickbooks, click on Sales tab (1), then click on Invoices (2)
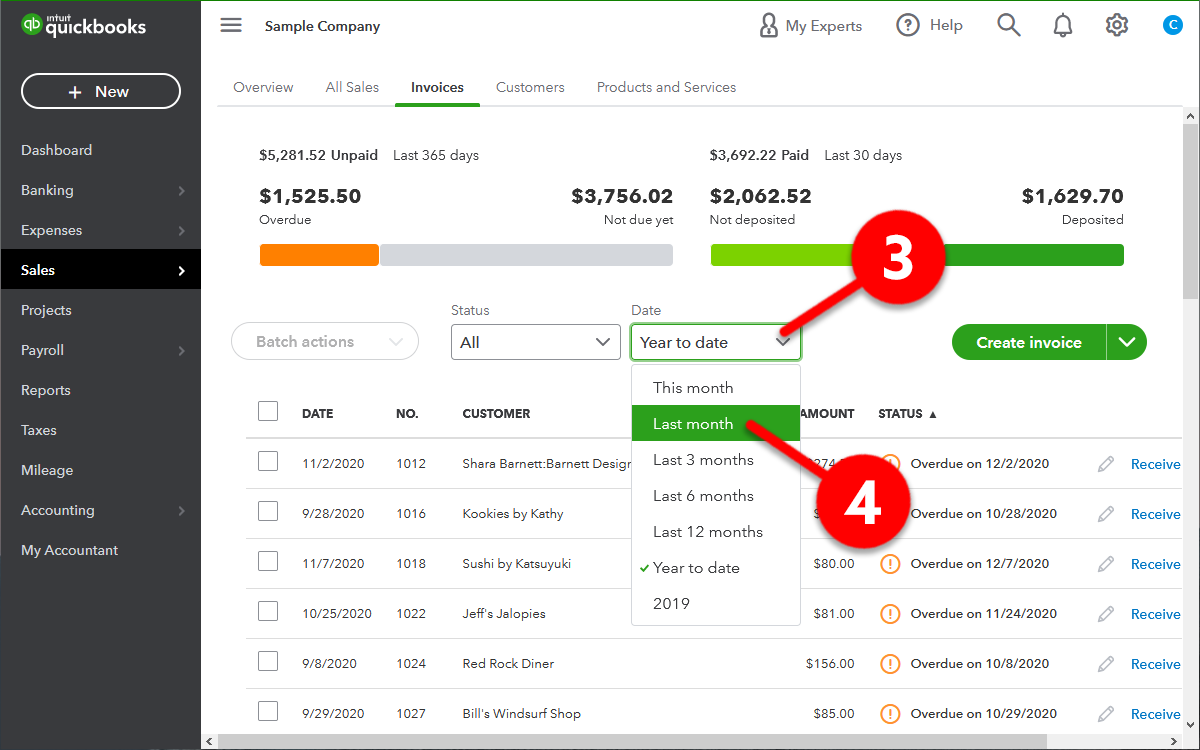
In the Date window (3), click on Last month (4)
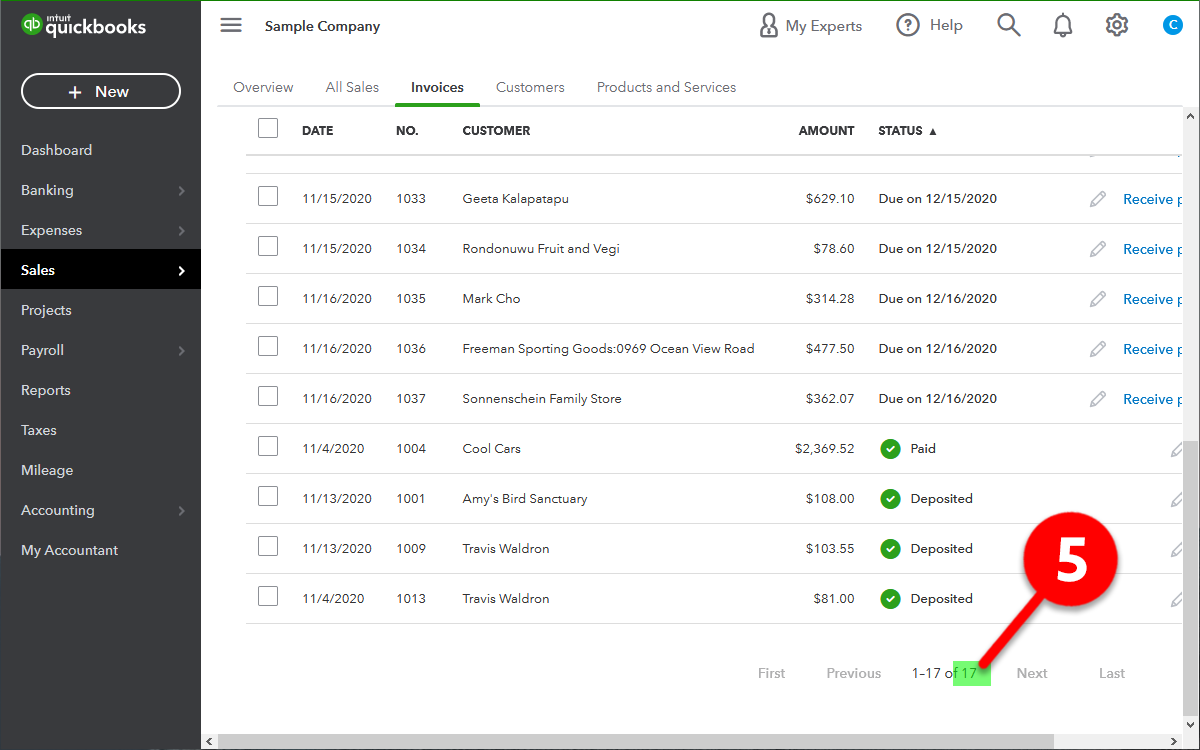
Scroll to the bottom of the page, and you’ll see the number of invoices from last month before the NEXT button (5)
Providing access to your Quickbooks account
We can help you get started with KPI Works faster by extracting your historical data out of Quickbooks, and using it to pre-populate your KPI Works dashboard. This is an optional and complimentary service to all KPI Works users.
If you would like us to help you, please “invite” us as a user within your Quickbooks subscription, using the following details (please refer to the “how-to” screenshots below, if needed):
- Name: Dima
- Surname: Ivanov
- Email: support@kpiworks.com
- Access required to: Reports only
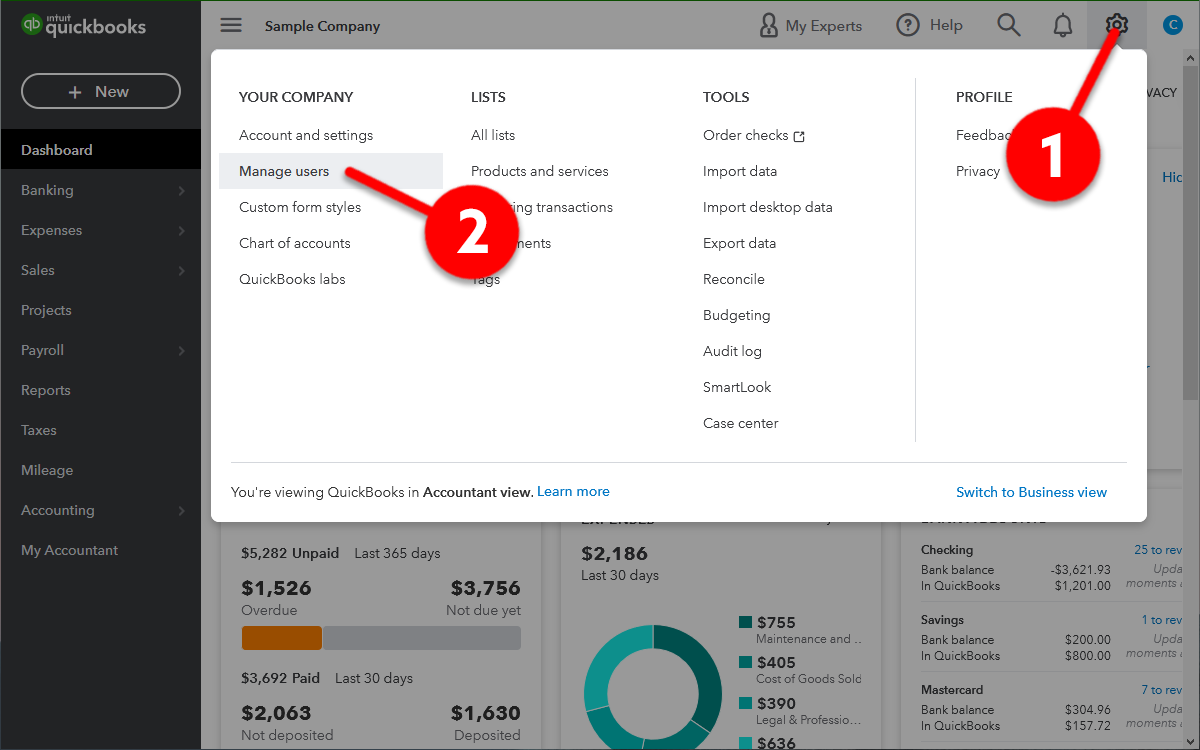
Once logged into Quickbooks, click on Gear icon in the top-right corner (1), then click on Manage users (2)
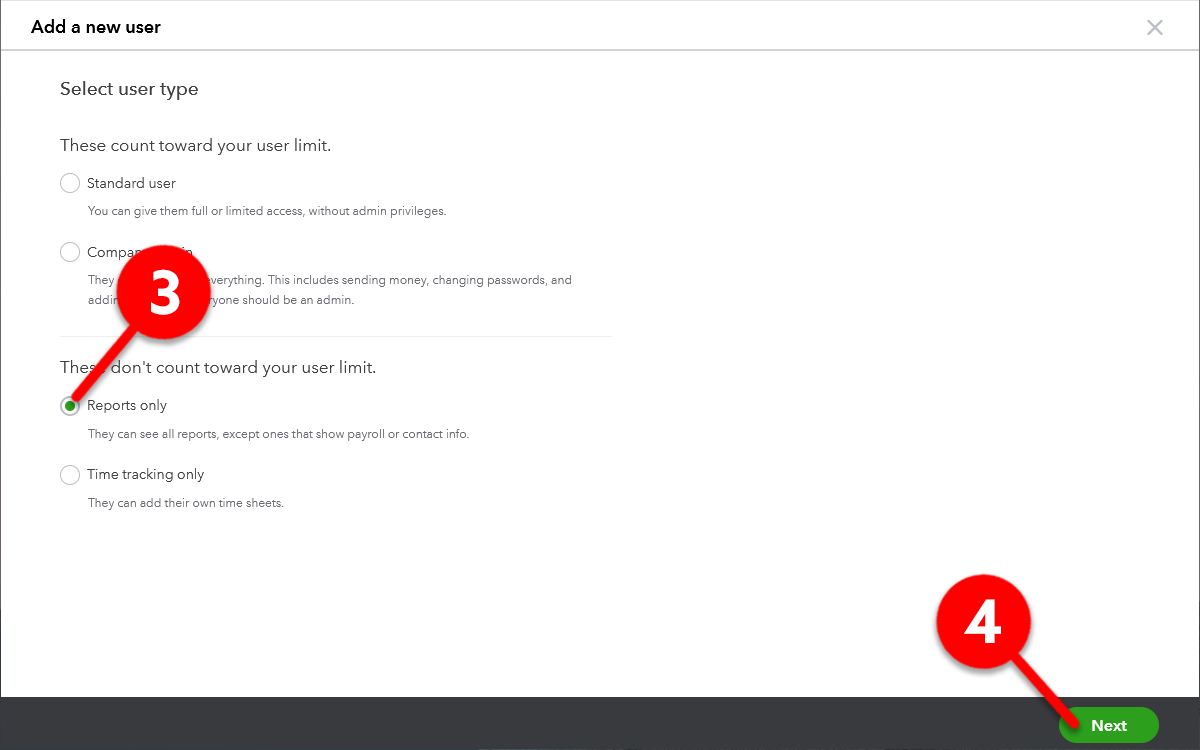
Check the Reports only button (3) and click Next (4)
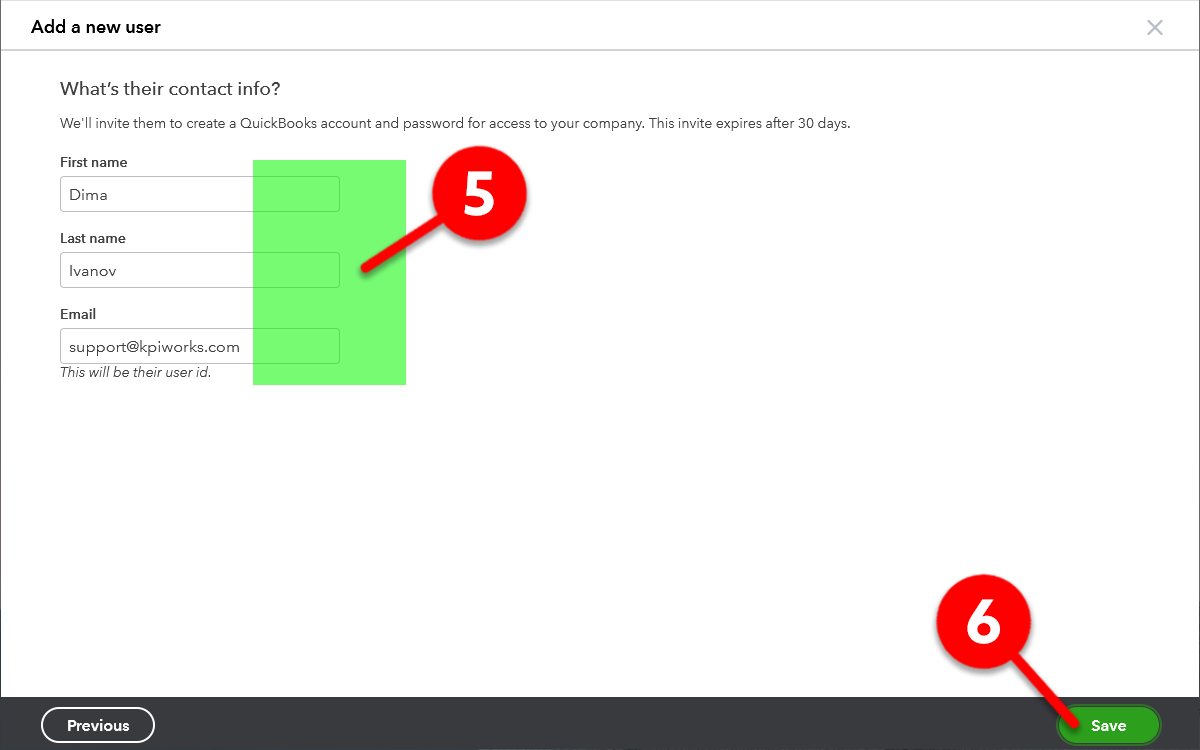
Use Dima Ivanov and support@kpiworks.com in the contact info section (5) and click Save (6)
Why we ask for historical data
Just in case you’re curious about “Why do you guys ask for our historical data?”, please watch this short 1-minute video:

